
1. What is Headless WordPress?
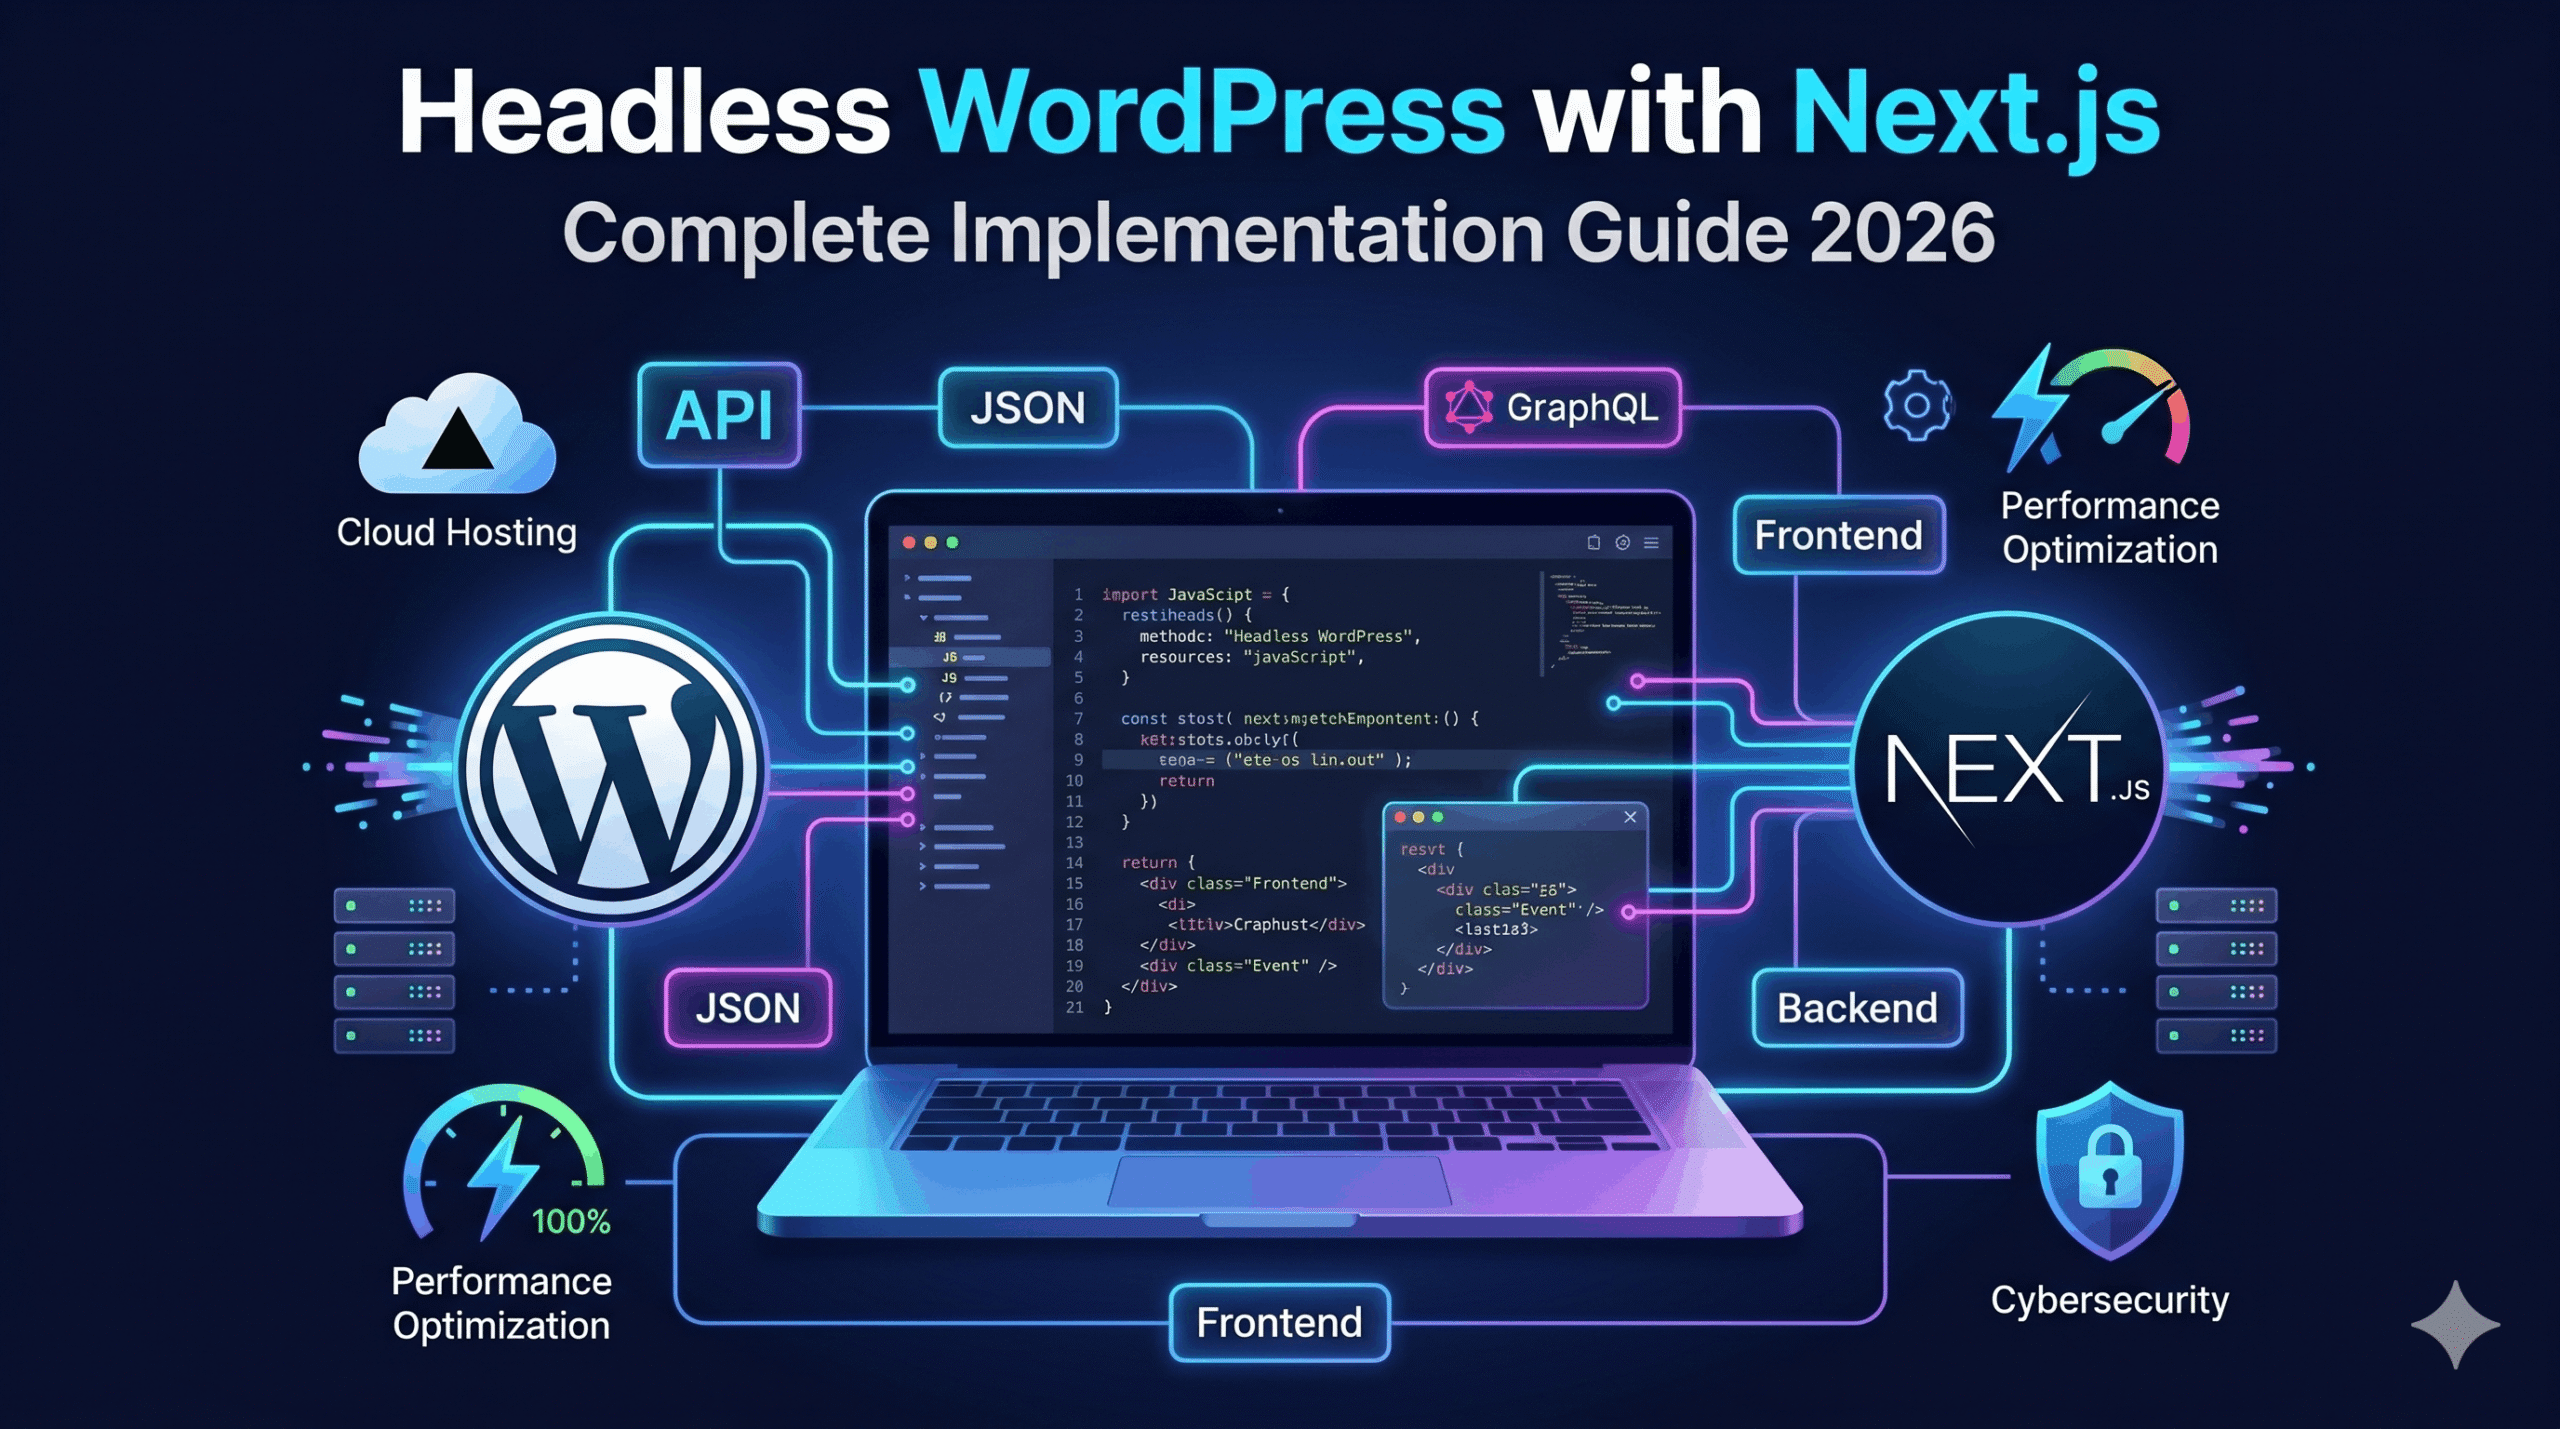
Headless WordPress represents a fundamental shift in how we approach content management systems. Rather than coupling content storage with content presentation—as traditional WordPress does—headless WordPress separates these two concerns entirely. WordPress becomes a backend content management layer, while your frontend exists as a completely separate application.
The Traditional WordPress Problem
In a traditional WordPress setup, the core framework handles everything: content management, routing, rendering, and serving HTML directly to browsers. This monolithic approach has served millions of websites well, but it comes with inherent limitations. You’re locked into PHP templating, performance is constrained by server processing, and scaling becomes increasingly difficult as traffic grows.
How Headless WordPress Works
In a headless architecture, WordPress runs on one server and exposes content through an API. Your frontend consumes this API to build user interfaces independently. WordPress has no idea—nor does it care—how your content appears to visitors. This separation creates unprecedented flexibility.
When you query WordPress through its REST API or GraphQL endpoint, you receive structured JSON data. Your frontend receives this data and decides how to present it. You could render the same content for web browsers, mobile apps, smartwatch displays, or even voice assistants. WordPress becomes your content source of truth while your frontend becomes the presentation layer.
Real-World Implications
Consider a content update workflow. In traditional WordPress, you edit a post, and the changes appear immediately on your website. With headless WordPress, the content update is just step one. Your frontend application must then fetch the new data, potentially regenerate pages, and redeploy. This might seem like extra work, but it unlocks powerful capabilities like static site generation, incremental static regeneration, and distributed edge caching.
The separation also means you can completely redesign your frontend without touching your content. You could migrate from Next.js to another framework tomorrow without affecting a single piece of content. That’s the beauty of headless architecture—complete independence.
Prerequisites for Headless WordPress
Before diving into implementation, you need:
- A WordPress installation (self-hosted or managed hosting)
- Basic understanding of REST APIs and JSON
- Familiarity with React or modern JavaScript frameworks
- Node.js development experience
- Understanding of HTTP requests and async/await patterns
2. Why Next.js + WordPress is the Perfect Pairing
Next.js has emerged as the gold standard frontend framework for headless WordPress implementations. This isn’t coincidental—the alignment is nearly perfect.
Performance: The Primary Advantage
Next.js excels at one critical task: delivering fast websites. Using static site generation, the framework can pre-build entire pages at build time, converting them to static HTML. When users visit, they receive pure static files served from a CDN, not dynamically generated pages. This results in sub-second load times and eliminates the “Time to First Byte” problem that plagues traditional WordPress.
Incremental Static Regeneration (ISR) extends this further. Imagine you have 10,000 blog posts. Rebuilding every post on every content change would take hours. With ISR, Next.js rebuilds only the pages that changed, on-demand, in the background. Users see updates within seconds while your build process stays manageable.
The Framework’s Architecture
Next.js is built on React but provides structural conventions that matter for content sites. You don’t need to assemble your own routing system—files in the pages directory automatically become routes. You don’t need to configure build optimization—Next.js handles code splitting, image optimization, and asset minification. This convention-over-configuration approach means less boilerplate and more focus on features.
The framework also provides native TypeScript support, built-in CSS handling, API routes for middleware, and automatic code optimization. For WordPress integrations, this means you can build the entire application—both data fetching and presentation—without external build tool configuration.
Static Generation with Dynamic Content
Here’s where the magic happens. Next.js supports generating static pages from dynamic data. You can tell Next.js to fetch all your WordPress blog posts at build time, generate a static HTML file for each, and deploy those files globally.
This approach combines the best of both worlds: the performance of static sites and the flexibility of dynamic content management. Users get lightning-fast page loads while you maintain the convenience of WordPress for content editing.
SEO Benefits Out of the Box
Search engines love fast websites. They also appreciate properly structured metadata, which Next.js makes trivial through the next/head component. You can dynamically generate meta titles, descriptions, and Open Graph tags from WordPress content. The framework handles server-side rendering when needed, ensuring search bots see fully rendered content.
Next.js also generates XML sitemaps easily and supports structured data (JSON-LD) natively. When combined with WordPress as a content source, you get a fundamentally SEO-optimized platform.
Developer Experience
The developer experience with Next.js is exceptional. Hot module reloading means changes appear instantly during development. TypeScript integration is seamless. Testing is straightforward because components remain decoupled from API logic. The learning curve is gentle compared to complex build configuration.
When connecting to WordPress, the simplicity shines. Fetching data is just async functions. Presenting data is just React components. There’s no WordPress-specific templating to learn, no complex hooks system to master. You work with JavaScript, React, and standard web patterns.
Scalability and Cost
Traditional WordPress faces scaling challenges. Adding more traffic requires upgrading hosting, configuring caching layers, and optimizing the database. As traffic grows, costs scale proportionally.
Next.js with static generation flips this equation. Once pages are generated, they’re static files. Serving 100 requests per second costs no more than serving 100 requests per month. Platforms like Vercel, Netlify, and AWS offer generous free tiers and only charge when you exceed massive traffic thresholds.
The separation also allows independent scaling. Your WordPress backend runs on inexpensive managed hosting. Your frontend deploys to a global CDN with automatic scaling. You pay only for what you use.
WordPress’s Role as Content Hub
By choosing Next.js, you unlock WordPress’s true potential as a content management system. You’re not fighting the platform trying to achieve performance—you’re using it for what it does best: content creation and editing.
WordPress’s ecosystem of plugins, user management, and editorial workflows remains intact. Editors can continue using the familiar WordPress interface while developers build cutting-edge frontends. This division of concerns often improves team dynamics and deployment safety.
3. Architecture Overview
Before implementing, understanding the complete architecture ensures better decision-making throughout development.
System Components
The headless WordPress + Next.js architecture consists of several key components:
WordPress Backend (Content Layer)
- Runs on a web server with PHP and MySQL
- Contains all content, media, users, and settings
- Exposes content through REST API and/or GraphQL
- Handles administrative interface and editorial workflows
- Typically runs on managed hosting (WP Engine, Kinsta, Bluehost, etc.)
API Layer (Content Delivery)
- REST API (built into WordPress core)
- GraphQL API (via WPGraphQL plugin)
- Custom endpoints for specific functionality
- Authentication and authorization logic
Next.js Frontend (Presentation Layer)
- Runs on serverless infrastructure or Edge servers
- Manages routing, components, and styling
- Fetches data from WordPress API
- Generates static pages at build time
- Optionally includes API routes for additional middleware
CDN (Content Distribution)
- Caches static HTML files globally
- Serves assets with minimal latency
- Often integrated with the hosting platform
Build Process (Automation)
- Detects WordPress content changes
- Triggers Next.js rebuilds
- Deploys updated static files
Data Flow Architecture
Understanding how data flows through the system clarifies implementation decisions:
- Content Creation: Editor creates/updates post in WordPress admin
- Webhook Trigger: WordPress sends webhook to build service
- API Query: Build service calls WordPress API to fetch content
- Page Generation: Next.js generates static HTML from content
- Deployment: Static files deploy to CDN
- User Request: Visitor requests page from CDN
- Cache Hit: CDN serves cached static file
- Page Display: Browser renders HTML instantly
This flow completes in seconds, providing near-real-time updates while maintaining static site performance.
REST API vs GraphQL
WordPress provides both API options, and understanding the differences guides your choice:
REST API
- Built into WordPress core
- Endpoint per resource type (
/posts,/users,/comments) - Over-fetching: receives all fields even if you need few
- Under-fetching: requires multiple requests for related content
- Simpler to understand initially
- Mature and stable
GraphQL
- Requires WPGraphQL plugin
- Single endpoint queries exactly what you need
- Request only necessary fields, reducing payload
- Fetch related content in single request
- More powerful query language
- Better for complex content relationships
For most WordPress + Next.js projects, GraphQL is superior. You request only needed fields, reducing API payload and improving performance. You fetch all related content in one request, simplifying frontend logic. However, if you want minimal backend configuration, REST API works perfectly well.
Content Cache Strategy
Caching strategies significantly impact performance and user experience. Consider these approaches:
Cache on CDN WordPress pages typically don’t change hourly. Set aggressive CDN cache headers (24 hours) and invalidate on content updates. This approach maximizes global performance.
Stale While Revalidate Serve cached content immediately while fetching fresh data in background. Users get instant pages while content updates in seconds.
Incremental Static Regeneration Next.js rebuilds changed pages on-demand. Users see updates within regeneration window (typically 1-10 seconds).
Client-Side Caching Next.js includes SWR library for client-side API caching with revalidation. Useful for frequently changing data.
The optimal strategy depends on your content update frequency and how quickly changes need to appear.
Webhook-Driven Rebuilds
Connecting WordPress to your build process requires webhooks. When content updates, WordPress sends HTTP requests to your build service:
WordPress (Content Update)
  ↓
Webhook Sent to Build Service
  ↓
Build Service Receives Event
  ↓
Next.js Build Triggered
  ↓
API Fetches WordPress Data
  ↓
Pages Generated/Regenerated
  ↓
Files Deploy to CDN
  ↓
Users See Updates
Services like Vercel and Netlify handle this automatically. When you push code updates, they trigger builds. Setting up webhooks from WordPress to these services enables automatic rebuilds on content changes.
4. Step-by-Step Implementation Guide
Now we move from theory to practice. This section provides concrete code and configuration for a working implementation.
Phase 1: WordPress Preparation
Install and Activate WPGraphQL
WPGraphQL is the WordPress plugin that enables GraphQL queries. While not required (REST API works), GraphQL is recommended for most projects.
- Log into WordPress admin dashboard
- Navigate to Plugins → Add New
- Search for “WPGraphQL”
- Install and activate the plugin by WP Engine
The plugin is now active. You can verify by visiting:
https://your-wordpress.com/graphql
You should see GraphiQL interface—a GraphQL playground for testing queries.
Configure WordPress Permissions
WordPress requires public posts to be queryable. Ensure your posts are published (not draft) and set to public visibility. For custom post types, WPGraphQL must be explicitly enabled.
In your WordPress theme’s functions.php or a custom plugin, you can enable GraphQL for custom post types:
register_post_type( 'case_study', array(
    'label'       => 'Case Studies',
    'show_in_rest' => true,
    'show_in_graphql' => true,
    'graphql_single_name' => 'caseStudy',
    'graphql_plural_name' => 'caseStudies',
    // ... other arguments
) );
Create Sample Content
Create several WordPress posts with:
- Titles and content
- Featured images
- Categories
- Custom fields (optional, for advanced queries)
This content becomes your test data for frontend development.
Document Your GraphQL Schema
Visit the GraphiQL interface and explore available queries. The schema explorer (usually accessible via documentation button) shows all available fields. Document which fields you’ll need for your frontend.
Phase 2: Next.js Project Setup
Initialize Next.js Project
npx create-next-app@latest headless-wordpress-nextjs \
  --typescript \
  --tailwind \
  --app-router
cd headless-wordpress-nextjs
This command creates a new Next.js project with TypeScript and Tailwind CSS. The App Router is recommended for new projects.
Install Required Dependencies
npm install axios graphql-request
npm install --save-dev @types/node
axios: HTTP client for API requests (alternative to fetch)graphql-request: Lightweight GraphQL client, more convenient than raw fetch for GraphQL@types/node: TypeScript types for Node.js APIs
Project Structure
Organize your project logically:
src/
├── app/
│   ├── layout.tsx              # Root layout
│   ├── page.tsx                # Home page
│   ├── blog/
│   │   ├── page.tsx            # Blog listing
│   │   └── [slug]/
│   │       └── page.tsx        # Individual post
│   └── api/
│       └── revalidate/          # Webhook endpoint for rebuilds
├── components/
│   ├── Header.tsx
│   ├── Footer.tsx
│   └── PostCard.tsx
├── lib/
│   ├── wordpress.ts            # WordPress API client
│   ├── queries.ts              # GraphQL queries
│   └── types.ts                # TypeScript types
└── public/
    └── images/
Create WordPress API Client
Create src/lib/wordpress.ts:
import { GraphQLClient, gql } from 'graphql-request';

const endpoint = process.env.NEXT_PUBLIC_WORDPRESS_API_URL ||
  'https://your-wordpress.com/graphql';

export const graphqlClient = new GraphQLClient(endpoint, {
  headers: {
    'Content-Type': 'application/json',
  },
});

// REST API client alternative
export const restAPI = {
  baseURL: process.env.NEXT_PUBLIC_WORDPRESS_REST_URL ||
    'https://your-wordpress.com/wp-json',

  async fetch(endpoint: string, options = {}) {
    const response = await fetch(`${this.baseURL}${endpoint}`, {
      headers: {
        'Content-Type': 'application/json',
        ...options.headers,
      },
      ...options,
    });

    if (!response.ok) {
      throw new Error(`API Error: ${response.status}`);
    }

    return response.json();
  },
};
Define TypeScript Types
Create src/lib/types.ts:
export interface Post {
  id: string;
  databaseId: number;
  title: string;
  slug: string;
  content: string;
  excerpt: string;
  date: string;
  modified: string;
  featuredImage?: {
    node: {
      sourceUrl: string;
      altText: string;
    };
  };
  categories?: {
    nodes: Category[];
  };
  author?: {
    node: {
      name: string;
      url: string;
    };
  };
}

export interface Category {
  id: string;
  name: string;
  slug: string;
  description?: string;
}

export interface WordPressResponse<T> {
  data: T;
  errors?: Array<{
    message: string;
  }>;
}
Phase 3: Data Fetching Implementation
Create GraphQL Queries
Create src/lib/queries.ts:
import { gql } from 'graphql-request';

export const GET_ALL_POSTS = gql`
  query GetAllPosts($first: Int = 10, $after: String) {
    posts(first: $first, after: $after) {
      edges {
        node {
          id
          databaseId
          title
          slug
          excerpt
          date
          featuredImage {
            node {
              sourceUrl
              altText
            }
          }
          author {
            node {
              name
              url
            }
          }
          categories(first: 3) {
            nodes {
              id
              name
              slug
            }
          }
        }
      }
      pageInfo {
        hasNextPage
        endCursor
      }
    }
  }
`;

export const GET_POST_BY_SLUG = gql`
  query GetPostBySlug($slug: String!) {
    postBy(slug: $slug) {
      id
      databaseId
      title
      content
      excerpt
      date
      modified
      featuredImage {
        node {
          sourceUrl
          altText
        }
      }
      author {
        node {
          name
          url
        }
      }
      categories(first: 10) {
        nodes {
          id
          name
          slug
        }
      }
    }
  }
`;

export const GET_ALL_POST_SLUGS = gql`
  query GetAllPostSlugs($first: Int = 100, $after: String) {
    posts(first: $first, after: $after) {
      edges {
        node {
          slug
        }
      }
      pageInfo {
        hasNextPage
        endCursor
      }
    }
  }
`;
Implement Data Fetching Functions
Update src/lib/wordpress.ts to add fetching functions:
import { POST, Category } from './types';
import {
  GET_ALL_POSTS,
  GET_POST_BY_SLUG,
  GET_ALL_POST_SLUGS
} from './queries';

export async function getAllPosts(
  first: number = 10,
  after?: string
): Promise<Post[]> {
  try {
    const data = await graphqlClient.request(GET_ALL_POSTS, {
      first,
      after,
    });

    return data.posts.edges.map((edge: any) => edge.node);
  } catch (error) {
    console.error('Error fetching posts:', error);
    throw error;
  }
}

export async function getPostBySlug(slug: string): Promise<Post | null> {
  try {
    const data = await graphqlClient.request(GET_POST_BY_SLUG, {
      slug,
    });

    return data.postBy || null;
  } catch (error) {
    console.error(`Error fetching post ${slug}:`, error);
    throw error;
  }
}

export async function getAllPostSlugs(): Promise<string[]> {
  const slugs: string[] = [];
  let hasNextPage = true;
  let after: string | undefined;

  while (hasNextPage) {
    const data = await graphqlClient.request(GET_ALL_POST_SLUGS, {
      first: 100,
      after,
    });

    data.posts.edges.forEach((edge: any) => {
      slugs.push(edge.node.slug);
    });

    hasNextPage = data.posts.pageInfo.hasNextPage;
    after = data.posts.pageInfo.endCursor;
  }

  return slugs;
}
Phase 4: Frontend Components
Create Blog Post Component
Create src/components/PostCard.tsx:
import Link from 'next/link';
import Image from 'next/image';
import { Post } from '@/lib/types';
import { formatDate } from '@/lib/utils';

interface PostCardProps {
  post: Post;
}

export default function PostCard({ post }: PostCardProps) {
  return (
    <article className="bg-white rounded-lg shadow-md overflow-hidden hover:shadow-lg transition-shadow">
      {post.featuredImage && (
        <Link href={`/blog/${post.slug}`}>
          <div className="relative w-full h-48">
            <Image
              src={post.featuredImage.node.sourceUrl}
              alt={post.featuredImage.node.altText || post.title}
              fill
              className="object-cover"
            />
          </div>
        </Link>
      )}

      <div className="p-6">
        <div className="flex gap-2 mb-3">
          {post.categories?.nodes.map((category) => (
            <span
              key={category.id}
              className="text-xs font-semibold text-blue-600 bg-blue-100 px-3 py-1 rounded-full"
            >
              {category.name}
            </span>
          ))}
        </div>

        <h3 className="text-xl font-bold mb-2">
          <Link
            href={`/blog/${post.slug}`}
            className="hover:text-blue-600 transition-colors"
          >
            {post.title}
          </Link>
        </h3>

        <p className="text-gray-600 text-sm mb-4">{post.excerpt}</p>

        <div className="flex justify-between items-center text-sm text-gray-500">
          <span>{post.author?.node.name}</span>
          <span>{formatDate(post.date)}</span>
        </div>

        <Link
          href={`/blog/${post.slug}`}
          className="inline-block mt-4 text-blue-600 font-semibold hover:text-blue-800"
        >
          Read More →
        </Link>
      </div>
    </article>
  );
}
Create Single Post Page
Create src/app/blog/[slug]/page.tsx:
import { notFound } from 'next/navigation';
import Image from 'next/image';
import {
  getPostBySlug,
  getAllPostSlugs
} from '@/lib/wordpress';
import { formatDate } from '@/lib/utils';

interface PostPageProps {
  params: {
    slug: string;
  };
}

export async function generateStaticParams() {
  try {
    const slugs = await getAllPostSlugs();
    return slugs.map((slug) => ({
      slug,
    }));
  } catch (error) {
    console.error('Error generating static params:', error);
    return [];
  }
}

export async function generateMetadata({ params }: PostPageProps) {
  const post = await getPostBySlug(params.slug);

  if (!post) {
    return {
      title: 'Post Not Found',
      description: 'The requested post could not be found.',
    };
  }

  return {
    title: post.title,
    description: post.excerpt,
    openGraph: {
      title: post.title,
      description: post.excerpt,
      images: post.featuredImage ?
        [post.featuredImage.node.sourceUrl] : [],
      type: 'article',
      publishedTime: post.date,
      modifiedTime: post.modified,
    },
  };
}

export default async function PostPage({ params }: PostPageProps) {
  const post = await getPostBySlug(params.slug);

  if (!post) {
    notFound();
  }

  return (
    <article className="max-w-3xl mx-auto py-12 px-4">
      <header className="mb-8">
        <h1 className="text-4xl font-bold mb-4">{post.title}</h1>

        <div className="flex items-center gap-4 text-gray-600 mb-6">
          <span>{post.author?.node.name}</span>
          <span>•</span>
          <time>{formatDate(post.date)}</time>
          <span>•</span>
          <span className="italic">5 min read</span>
        </div>

        {post.categories?.nodes.length > 0 && (
          <div className="flex gap-2 mb-6">
            {post.categories.nodes.map((category) => (
              <span
                key={category.id}
                className="text-sm font-semibold text-blue-600 bg-blue-100 px-3 py-1 rounded-full"
              >
                {category.name}
              </span>
            ))}
          </div>
        )}
      </header>

      {post.featuredImage && (
        <div className="relative w-full h-96 mb-8 rounded-lg overflow-hidden">
          <Image
            src={post.featuredImage.node.sourceUrl}
            alt={post.featuredImage.node.altText || post.title}
            fill
            className="object-cover"
            priority
          />
        </div>
      )}

      <div
        className="prose prose-lg max-w-none mb-8"
        dangerouslySetInnerHTML={{ __html: post.content }}
      />

      {post.modified && (
        <footer className="text-sm text-gray-500 border-t pt-4">
          Last updated on {formatDate(post.modified)}
        </footer>
      )}
    </article>
  );
}
Create Blog Listing Page
Create src/app/blog/page.tsx:
import { Suspense } from 'react';
import { getAllPosts } from '@/lib/wordpress';
import PostCard from '@/components/PostCard';

async function PostsList() {
  try {
    const posts = await getAllPosts(12);

    return (
      <div className="grid grid-cols-1 md:grid-cols-2 lg:grid-cols-3 gap-6">
        {posts.map((post) => (
          <PostCard key={post.id} post={post} />
        ))}
      </div>
    );
  } catch (error) {
    return (
      <div className="text-center py-12">
        <p className="text-red-600">Error loading posts. Please try again later.</p>
      </div>
    );
  }
}

export default function BlogPage() {
  return (
    <div className="max-w-7xl mx-auto py-12 px-4">
      <header className="mb-12">
        <h1 className="text-4xl font-bold mb-4">Blog</h1>
        <p className="text-xl text-gray-600">
          Insights and guides on web development, Next.js, and WordPress.
        </p>
      </header>

      <Suspense fallback={<div>Loading posts...</div>}>
        <PostsList />
      </Suspense>
    </div>
  );
}
Phase 5: Deployment and Webhooks
Configure Environment Variables
Create .env.local:
NEXT_PUBLIC_WORDPRESS_API_URL=https://your-wordpress.com/graphql
NEXT_PUBLIC_WORDPRESS_REST_URL=https://your-wordpress.com/wp-json
WEBHOOK_SECRET=your_secret_key_here
Deploy to Vercel
- Push your project to GitHub
- Import project in Vercel dashboard
- Add environment variables
- Deploy
Vercel automatically deploys on git push.
Setup WordPress Webhook
For automatic rebuilds on content updates, use WP Engine’s Smart Plugin or a webhook plugin:
- Install “WPGraphQL Content Blocks” or use WordPress REST API
- Create webhook pointing to Vercel:
https://api.vercel.com/v1/deployments?teamId=YOUR_TEAM_ID
- Set authentication header with Vercel token
Alternatively, use Zapier or Make (formerly Integromat) to trigger builds on WordPress post updates.
5. Performance Optimization
Performance separates successful implementations from merely functional ones.
Image Optimization
Images constitute 50%+ of page weight. Next.js Image component handles optimization automatically:
- Responsive Images: Serves different sizes for different devices
- Lazy Loading: Images load only when near viewport
- Format Optimization: Serves WebP to supporting browsers
- Blur Placeholder: Shows low-quality placeholder while loading
Ensure WordPress featured images are reasonably sized (max 2000px width).
Static Generation Strategy
Implement ISR (Incremental Static Regeneration):
export const revalidate = 3600; // Revalidate every hour
Set revalidate to a reasonable interval. Once cache expires and a user requests a page, Next.js regenerates it in background while serving stale version. Users see instant pages while updates propagate.
Code Splitting
Next.js automatically code splits pages. Components loaded on specific pages don’t load elsewhere. For heavy components, use dynamic imports:
import dynamic from 'next/dynamic';

const CommentForm = dynamic(
  () => import('@/components/CommentForm'),
  { loading: () => <p>Loading comments...</p> }
);
Caching Headers
Set aggressive cache headers in next.config.js:
/** @type {import('next').NextConfig} */
const nextConfig = {
  images: {
    remotePatterns: [
      {
        protocol: 'https',
        hostname: 'your-wordpress.com',
      },
    ],
  },
  headers: async () => {
    return [
      {
        source: '/blog/:path*',
        headers: [
          {
            key: 'Cache-Control',
            value: 'public, s-maxage=3600, stale-while-revalidate=86400',
          },
        ],
      },
    ];
  },
};

module.exports = nextConfig;
Database Query Optimization
In WordPress, optimize your GraphQL queries:
# Bad: Over-fetches fields you don't need
query {
  posts(first: 100) {
    edges {
      node {
        id
        title
        content
        excerpt
        # ... 20 more fields
      }
    }
  }
}

# Good: Request only needed fields
query {
  posts(first: 100) {
    edges {
      node {
        id
        title
        excerpt
      }
    }
  }
}
Monitoring Performance
Use Next.js built-in analytics:
import { useReportWebVitals } from 'next/web-vitals';

function MyApp({ Component, pageProps }) {
  useReportWebVitals((metric) => {
    console.log(metric);
    // Send to analytics service
  });

  return <Component {...pageProps} />;
}
Integrate with services like Vercel Analytics, Google Analytics, or Datadog for comprehensive monitoring.
6. SEO Considerations
Headless architecture requires intentional SEO implementation—it doesn’t happen automatically.
Meta Tags and Structured Data
Generate dynamic meta tags from WordPress content:
export async function generateMetadata({ params }: PostPageProps) {
  const post = await getPostBySlug(params.slug);

  return {
    title: `${post.title} | My Blog`,
    description: post.excerpt,
    keywords: post.categories?.nodes.map(c => c.name).join(', '),
    openGraph: {
      title: post.title,
      description: post.excerpt,
      images: [post.featuredImage?.node.sourceUrl],
      type: 'article',
      publishedTime: post.date,
    },
    twitter: {
      card: 'summary_large_image',
      title: post.title,
      description: post.excerpt,
      images: [post.featuredImage?.node.sourceUrl],
    },
  };
}
JSON-LD Structured Data
Add Article schema to post pages:
const jsonLd = {
  '@context': 'https://schema.org',
  '@type': 'BlogPosting',
  headline: post.title,
  description: post.excerpt,
  image: post.featuredImage?.node.sourceUrl,
  datePublished: post.date,
  dateModified: post.modified,
  author: {
    '@type': 'Person',
    name: post.author?.node.name,
  },
  publisher: {
    '@type': 'Organization',
    name: 'Your Site Name',
  },
};
Render in app/blog/[slug]/page.tsx:
<script
  type="application/ld+json"
  dangerouslySetInnerHTML={{ __html: JSON.stringify(jsonLd) }}
/>
Sitemap Generation
Create app/sitemap.ts:
import { MetadataRoute } from 'next';
import { getAllPostSlugs } from '@/lib/wordpress';

export default async function sitemap(): Promise<MetadataRoute.Sitemap> {
  const baseUrl = 'https://your-site.com';
  const slugs = await getAllPostSlugs();

  const posts = slugs.map((slug) => ({
    url: `${baseUrl}/blog/${slug}`,
    lastModified: new Date(),
    changeFrequency: 'weekly' as const,
    priority: 0.8,
  }));

  return [
    {
      url: baseUrl,
      lastModified: new Date(),
      changeFrequency: 'daily' as const,
      priority: 1,
    },
    {
      url: `${baseUrl}/blog`,
      lastModified: new Date(),
      changeFrequency: 'daily' as const,
      priority: 0.9,
    },
    ...posts,
  ];
}
robots.txt
Create public/robots.txt:
User-agent: *
Allow: /
Disallow: /admin
Disallow: /wp-*

Sitemap: https://your-site.com/sitemap.xml
Canonical URLs
Prevent duplicate content issues:
<link
  rel="canonical"
  href={`https://your-site.com/blog/${post.slug}`}
/>
7. Real-World Case Study: TechBlog Magazine
To illustrate these concepts in practice, consider TechBlog Magazine—a mid-size tech publication with 15,000 monthly unique visitors.
The Challenge
TechBlog ran traditional WordPress on shared hosting. Pages loaded in 2-3 seconds, server costs were rising with traffic, and scaling required constant intervention. The editorial team couldn’t work during peak traffic hours due to admin slowness. They needed faster performance without sacrificing WordPress’s editorial workflow.
The Solution
TechBlog implemented headless WordPress with Next.js:
Architecture
- WordPress on WP Engine managed hosting ($115/month)
- Next.js frontend on Vercel ($20/month estimated)
- Total monthly cost: ~$135 (vs. previous $300+ for scaling)
Implementation Timeline
- Week 1: Environment setup, theme conversion
- Week 2-3: Data fetching, component development
- Week 4: Testing, optimization, deployment
- Week 5: Monitoring, refinement
Results
Performance Improvements
- First Contentful Paint: 3.2s → 0.6s (81% improvement)
- Time to Interactive: 5.1s → 1.2s (76% improvement)
- Lighthouse Score: 52 → 96
Business Impact
- Page load time reduction = 15% increase in pageviews
- Improved ad revenue from better metrics
- Support tickets decreased 40% (faster performance = fewer complaints)
- Editorial team productivity increased (faster admin operations)
Cost Impact
- Infrastructure costs decreased 55%
- No additional DevOps staff needed
- Time investment: 1 developer for 1 month
- ROI achieved in 2 months
Key Lessons
- Planning matters: Upfront architecture decisions prevented major refactors
- Monitoring is essential: Analytics revealed performance gaps and improvement opportunities
- Incremental adoption works: They migrated content gradually, maintaining old site during transition
- Team training required: Editorial team needed training on webhook/rebuild concepts
This case study demonstrates that headless WordPress with Next.js isn’t just technically superior—it’s economically advantageous for content-focused websites.
Conclusion
Headless WordPress with Next.js represents a maturation of both technologies. WordPress excels at content management while Next.js excels at content delivery. Combined, they create systems that are faster, cheaper, and more maintainable than either alone.
The implementation requires upfront work—setting up APIs, building frontend components, configuring deployments. But these efforts yield long-term benefits: superior performance, reduced operational costs, and increased development velocity.
As WordPress and Next.js continue evolving, this architecture becomes increasingly accessible. The plugins improve, the tooling simplifies, and the community provides more resources. If you’re building a content-heavy website in 2026, this approach deserves serious consideration.
Quick Checklist for Getting Started
- [ ] Choose and install WPGraphQL or test REST API
- [ ] Create sample content in WordPress
- [ ] Initialize Next.js project with TypeScript
- [ ] Build WordPress API client and queries
- [ ] Create frontend components and pages
- [ ] Implement static generation with
generateStaticParams - [ ] Test locally and verify performance
- [ ] Deploy to Vercel or similar platform
- [ ] Setup webhook for automatic rebuilds
- [ ] Monitor performance and iterate
The journey from traditional WordPress to headless architecture transforms not just your technical stack, but your entire approach to building fast, scalable web experiences. Start small, iterate thoughtfully, and the benefits will compound.
About the Author
This guide reflects current best practices as of May 2026. Technology evolves rapidly—check the official Next.js and WPGraphQL documentation for the latest updates.
Additional Resources